
Sunday, December 23, 2012
Friday, November 23, 2012
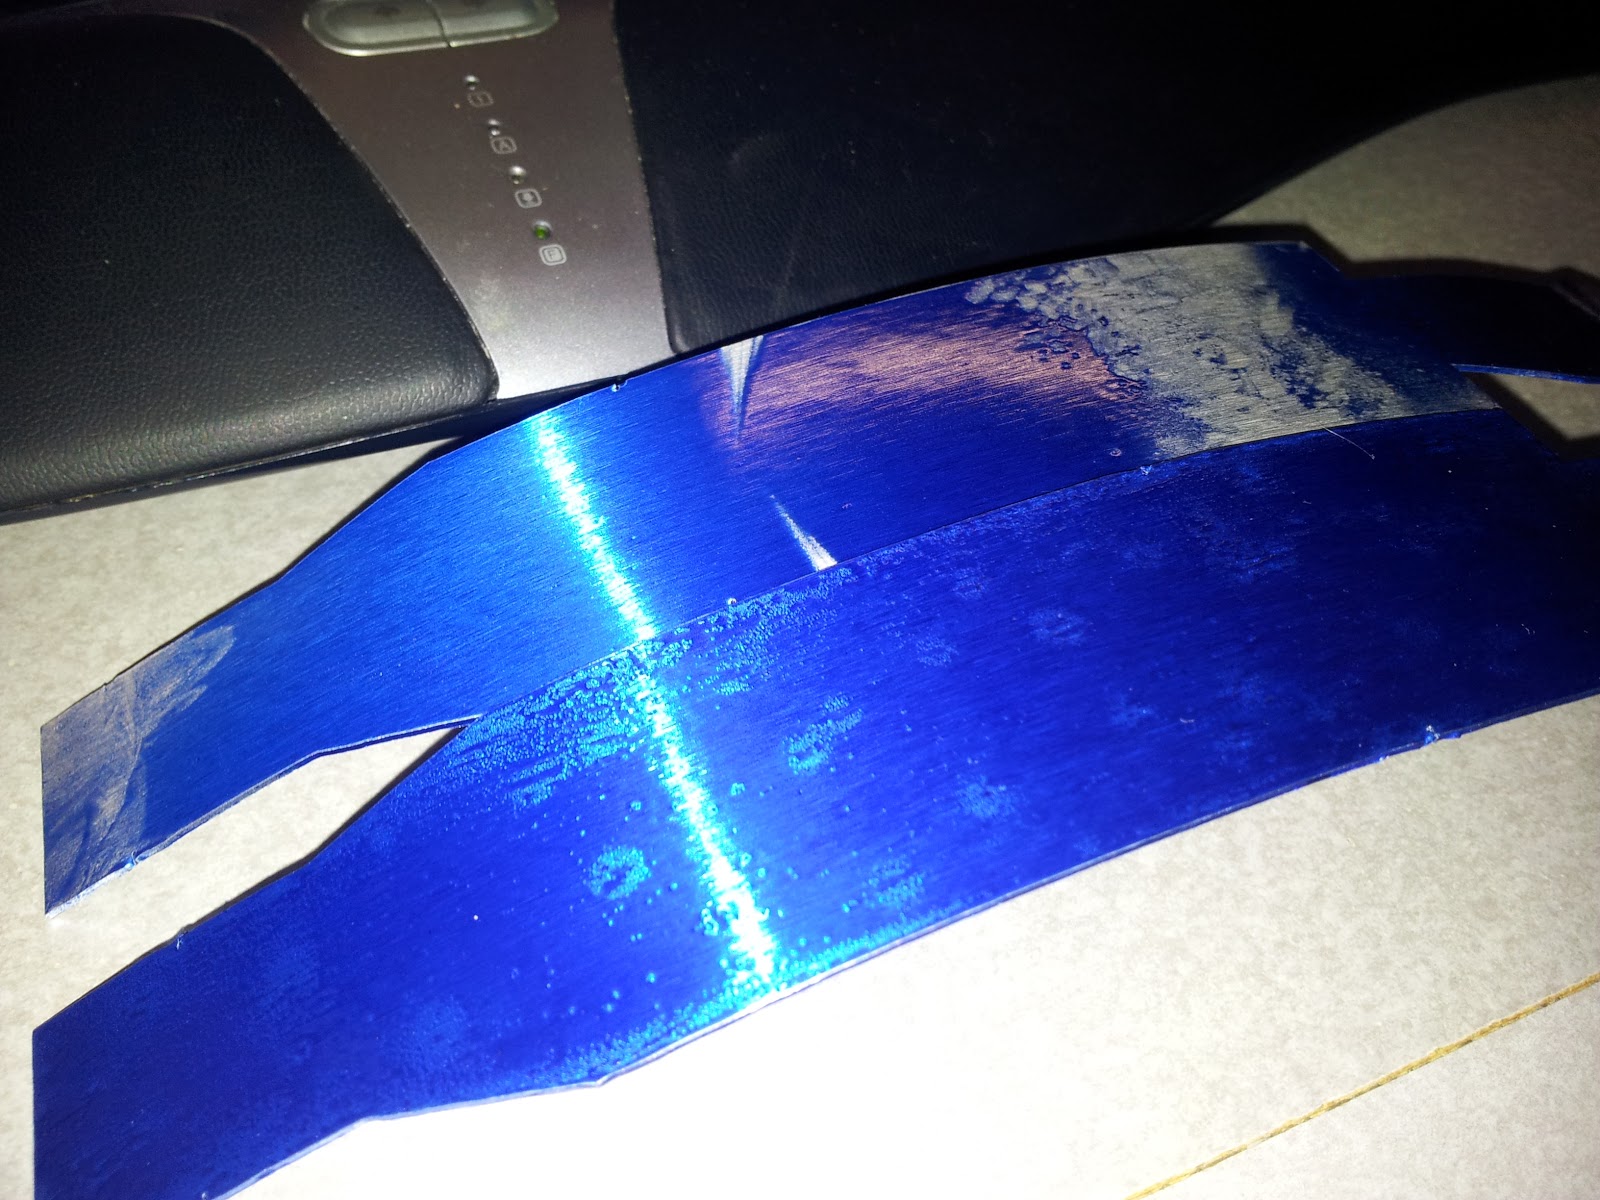
(11-22-2012) Another test

A Captain Obvious PRO TIP: Do NOT paint when it's trying to rain!
Still even with me being impatient and painting while it was about to start raining, the finish on these two pieces came out smooth, consistent and all together acceptable. The color appears lighter in the picture because of the flash, but I think it's a good blue for R2.

Wednesday, November 21, 2012
(11-20-2012) Tried a second coat and...
Tuesday, November 20, 2012
(11-20-2012) Powder coating tests
Tonight I tried to do a test with my powder paints. Neither of my tests turned out too good, but I think it will look great once I stop making errors.
I got an old toaster oven to use for baking the paint onto the test items (utility arm blanks taken out of the skins for this test). The first step is to set the oven to 425 degrees and let it warm up while you prep your piece and get the powder coat gun ready to go. Prepping the piece consisted of wiping it down good with alcohol and making sure it was dry.

Next step is to powder coat the piece and place it into the oven (no pictures of this step).
PRO TIP: Do not powder coat the piece and then drop it multiple times, like I did...
 Even after I dropped it, I placed it into the oven and let it "flow out" at 425, then turnedthe heat down to 375 and let it finish cooking for 15 minutes.
 And this was my last test. I put the powder on a bit too thin, but the results aren't too bad, for now.
I got an old toaster oven to use for baking the paint onto the test items (utility arm blanks taken out of the skins for this test). The first step is to set the oven to 425 degrees and let it warm up while you prep your piece and get the powder coat gun ready to go. Prepping the piece consisted of wiping it down good with alcohol and making sure it was dry.

Next step is to powder coat the piece and place it into the oven (no pictures of this step).
PRO TIP: Do not powder coat the piece and then drop it multiple times, like I did...


Monday, November 12, 2012
(11-12-12) Paint
The powder paint arrived and I got an old toaster oven to cook some samples with. The colors I'm testing are Jollipop blue and Glacier white from www.powdersbythepound.com and translucent blue and gloss white from www.eastwood.com - hopefully one of these colors will be acceptable and I can start painting R2 his proper colors. I'll post some pictures as soon as I have something to show.
Tuesday, November 6, 2012
(11-05-2012) Periscope arrives

The center foot is all assembled and the outer feet have been shipped. I still need ankles, but then R2 will be able to stand.
I also ordered R2's test paint last week. I ordered a powder coat gun and some different powder paints to try to match the look of R2. I'm looking to find a cheap kitchen stove or toaster oven to cook the parts and do some testing. I've always wanted to try powder coating and R2 is going to be my first try. Getting some blue on the dome will really make it look like R2, but the all aluminum look is really cool too.
Last but not least, the new periscope arrived last night. It was quite a complicated piece to assemble, but it looks great and it will be a great addition to the dome when the time comes.
Monday, September 17, 2012
(09-16-2012) Working on the electronics
This weekend I spent some time working on the electronics. I spent a loooooooong time trying to get the Syren 10A controller to work, but it seems to be a lost cause. I had planned to hook it up to the dome motor and control dome rotation, and maybe at some point that will happen, but for now I have the dome motor being controlled by a Sabertooth 2x12. The controls are through a C6C from cheap control systems, and is currently being controlled with a Playstation controller (wired controller, the wireless controller I have didn't work).
I also worked on my Teeces v3.0 lights some more. They seem to work fairly well with a good solid 5v from the bench power supply, but on battery they get a bit flaky. I still had no luck in updating the sketch to v3.1 on the Arduino that came with it. I ordered a new Arduino to do some playing with, and to hopefully figure out what I'm doing wrong.
If I can get the right screws/bolts today I will have the dome motor mounted. I can't wait to have the dome rotating and the lights working reliably. This will be a huge part of the electronics finished.
Monday, August 27, 2012
(08-26-2012) Hello, my little friend...

I reworked a few issues with the lighting. Some of the header pins were the wrong shape and the wire connectors were loose, so I replaced them on both the Arduino and the PSI boards to keep this from causing issues in the future.
I also tried to upload a later version of the sketch onto the Arduino, and for some reason I couldn't get it to upload. Everything looks right, and the lights on the Arduino and the USB interface flash when I hit the upload button. I keep getting a "not in sync" error, and I"m not sure what I'm doing wrong. Paul, aka Joymonkey, has been very helpful in troubleshooting the problem - as well as packaging up these great lighting kits for the club.
Sunday, August 26, 2012
(08-25-2012) More dome work...


Saturday I did more work on R2's dome. All of the holoprojectors and the front logic displays are mounted to the inner dome.
I ran into one small problem. The lights were working perfectly until I installed them in the dome. Once the front logic displays were installed I had to power them up and see the blinking lights in the dome, but they wouldn't work. Blast it!
I am running an old version of the Teeces kit where all of the lights are in a long single chain, which is prone to problems. I swapped out the longest cable in the chain for a shorter one and viola! The lights all started working again. Looks like I'm going to be soldering some wires onto my Arduino and changing the sketch to support parallel chains of lights.
All in all, a fairly productive day - even though the dome doesn't look that much more complete. I was hoping to get all of the lights installed and to finally see R2's dome all lit up, but it wasn't to be.
Friday, August 24, 2012
(08-23-2012) More holes...


Wednesday, August 22, 2012
(08-21-2012) Holoprojector Holes
I have been dreading cutting the inner dome ever since I got it. The worst part for me was making that first cut. Here is how I cut the HP holes in my dome...

Step 1: After deciding where you want the holes and marking the hole and the center point, make a rough cut inside of the marks. I drilled a hole in the center and then used a hole cutter (utterly useless - I won't be using it again, maybe next time I'll just use a hole saw) and a dremel with cutting disks (much better results - but hard to control).


After doing the front and rear holoprojector holes I'm far less worried about the remaining holes. I want to mount the two HPs to get the domes aligned before making any further cuts. Hopefully this will help in making sure everything is lined up as well as I can get it. I don't think the remaining holes will be too bad, except for the rear PSI.
Monday, August 6, 2012
(08-04-2012) More work...

This weekend I also spent some time wandering about Lowe's and found some hardware to mount the skirt to the COM 8B frame. It looks great!
And lastly, I have been investigating paint. My current thoughts are to get some transparent blue powder coat and try it out. This blue looks like it might be something close to what the R2.0 guys did with their blue. The only down side to this is that it may be too durable and make it hard to weather the blue effectively (show paint chips with metal underneath).
Monday, July 23, 2012
(07-22-2012) Dome sanding and polishing

Monday, June 18, 2012
(06-17-2012) Working on the rockler bearing
On Father's Day, I worked on the rockler bearing. I took all of the original ball bearings out and cleaned the races with alcohol. The races were smooth for the most part, but there were a couple of spots where it seemed very rough. I took some 360 grit sand paper and sanded the entire inner and outer races so that they were very smooth, then I used some mothers aluminum polish and gave them a quick smoothing and cleaning and then I reassembled everything, but this time I installed acetal ball bearings. The bearing assembly moves much smoother, but it's also much noisier because of the lack of the heavy grease used in the bearing from the factory. I think I will work on it more this week to get a smoother and quieter motion from the bearing.
I also worked on getting the pieces of the dome mount all assembled and tested. I tested the rockler bearing with the A&A drive gear, the white plastic dome mount ring and an aluminum dome mounting plate (for the day when I might mount a life form scanner or periscope). I'm still not exactly sure if I'm getting all of the pieces in the right order, so I'll keep researching until I get it right.
I also worked on getting the pieces of the dome mount all assembled and tested. I tested the rockler bearing with the A&A drive gear, the white plastic dome mount ring and an aluminum dome mounting plate (for the day when I might mount a life form scanner or periscope). I'm still not exactly sure if I'm getting all of the pieces in the right order, so I'll keep researching until I get it right.
Saturday, June 9, 2012
(06-09-2012) A small update

Sunday, April 15, 2012
(04-15-2012) A little update on R2

 The past few weeks I've been working on R2 when time allows. The lights have been completed (video) and the exterior dome is being sanded currently - slowly but surely. Last night my son and I wanted to see how R2's body is coming along, so I popped out the body panels and fitted what body pieces I have at the current time to see how it looks. Nothing is mounted, except for the large data port, but it's encouraging to see R2 taking shape to some small degree.
Thursday, March 8, 2012
(03-08-2012) The needle files...
I spent some time with some "jumbo needle files" and the dome this evening. Everywhere a panel was cut on the outer dome created a small lip on the inside of the outer dome. I used the needle files to file down the inner edge of all of the panels at a 45 degree angle. The result is a very nice fit of the outer dome to the inner dome, especially at the top pie panel area. The bottom of the outer dome seems a bit stretched, but maybe it's fixable by slightly bending the bottom frame of the outer dome, or if that doesn't work the old "duct tape" trick may need to be employed. I'm very happy with the fit now. Marking and cutting the inner dome are next. I'm very nervous about cutting it up.
Wednesday, March 7, 2012
Sunday, March 4, 2012
(03-04-2012) Teeces Lighting is 90% done

Today I was able to finished soldering up the all of the boards, except for the remaining LED's - those will need to be soldered in a checkerboard pattern to go with Milkbone's alterations to do the "slide" effect. Joymonkey's kit is super easy to put together, and it has great printed instructions as well as videos to help in assembly.
Saturday, March 3, 2012
(03-03-2012) Rear Logic Board is done
 Today the rear logic board is done, tested and working well. The only problem I had was several green LEDs in backwards, and they stayed lit all the time instead of flashing. It took a while to use solder braid and remove the offending LEDs, but it was very fun to build. Looking forward to finishing up the lights in the next week or so. I also want to make the PSI changes M1lkbone made to give it a more correct look.
Wednesday, February 29, 2012
(02-28-2012) Teeces lights arrive and assembly begins

The lights (Teeces V3) for R2 arrived on Monday (2-27-2012), but I had a job that evening and I was unable to get started on them, but last night (2-28-2012) I had a little time to get started on the rear logic board. I need to get a battery holder, power regulator and install some lights to test it. Sorry for the blurry picture, all I had was my phone to get a pic.
Saturday, January 14, 2012
Dome works continues
I did more filing and sanding and now the dome is completely de-burred and smoothed to my satisfaction. Next step is to fit the inner and outer domes and find the best fit, make my marks on the inner dome and the cutting begins. Very nervous to cut on such a nice piece.
And in the the new parts front: the radar dome eye lens came today (the big eye in the middle of R2's forehead).
Dome work begins


The slag removal didn't seem to go as easily. I first tried the recommended method of using a wood chisel to remove the slag. It did work to some extent, so it's a good first step, but I found in areas where lots of panels were removed that this was just too much pressure and was going to bend the dome. So, I used some medium coarseness steel wool to sand the back side of the dome and remove the slag. This worked much better, took longer, but I wasn't worried about putting too much pressure on the dome and deforming it. I still am not quite satisfied with the outer dome's fit to the inner dome, and so another round of sanding is coming today. It's good, but I know that the slag isn't all gone and I want a good tight fit. Also, as you smooth out the slag, be sure the reapply your panel numbers if you remove them.
Friday, January 13, 2012
New frame
Yesterday was a huge day for R2. His new aluminum frame arrived, with skin mounting blocks, leg to body hubs (leg flanges) and G10 side plates (for mounting electronics). In the form of electronics it also came with a wireless PS2 controller, a 6 channel servo controller, sabertooth motor controller, power adjuster for the servo controller (step down regulator) , the breakout board, slip ring connector for connecting dome electronics and the fuse block. Oh, and last but not least it came with the center vents.
So, it is a huge update for R2, and I haven't really had time to unpack an look at everything yet. Expect pictures and more updates soon.
So, it is a huge update for R2, and I haven't really had time to unpack an look at everything yet. Expect pictures and more updates soon.
Thursday, January 5, 2012
The big parts arrive!

The aluminum dome and skins have arrived!! Along with this I have acquired a few other parts (hose fittings, dome bumps and power couplers) and I've ordered a few more parts (legs, skirt, large data port, PSI kit, dome lighting and a radar dome lens). Its really starting to look like R2-D2!
I've also been working on software to control the dome motor, but haven't had any luck with it, yet. I suspect it may be interference from the cheap 12v power supply I'm using, but only time and testing will let me know for sure.
Subscribe to:
Comments (Atom)